My mom and I wanted to give something back and say a HUGE Thank you to Danny Wood & RememberBetty.com!
Find more videos like this on Remember Betty

Thursday, August 23, 2012
Saturday, August 18, 2012
Trash to Treasures...Old Bathroom Cabinet into Mosaic Kitchen Spice Rack
I don't know about you, but whenever I see mosaic pieces at craft shows, on pinterest or boutiques I always think that looks soo easy! So when I found this old bathroom cabinet at a garage sale for $5, I wanted to put myself to the test! Is it really easy??
 Here are the supplies that I used:


 I found the mosaic glass pieces at Micheal's. The pieces were too big to go direct from the package onto the cabinet. So it was time for some stress release! I grab a plastic bag, dropped in the pieces and hammered away! Man did that feel good!

 Next, I started to lie out the different glass pieces on the cabinet doors to make a pattern, before gluing them down.


 Once I came up with some sort of basic design I took the doors off the cabinet and removed the glass. Now time to add the pieces! I had seen a few ways to do this, everything from using a hot glue gun, to super glue and actual mosaic adhesive. I really wanted to use what I already had so I started out with my hot glue gun. That didn't last long. I forgot how messy glue guns are! And the pieces I did attached with the hot glue came off really easy when I applied the grout. So I switched to a Krazy Glue Pen and that worked GREAT!


 It took me about four hours to glue all the pieces on to the cabinet doors. Even though Krazy Glue sets very quickly, let it sit over night before applying the grout. Now I purchased some pre-mixed grout at my craft store and let me tell you, it was EXPENSIVE and did not work! I returned it then went to the hardware store and picked up some pre-mixed bright white grout for half the price. Don't get fooled into buying the stuff at the craft store. The grout I got at the hardware store works better and for double the amount of product I only paid $8!!
Follow the directions on the grout container on how to apply and clean. If some pieces fall off, don't worry. Simply re-glue OR just use the grout to add it back on. While I was waiting for the grout to dry I wanted to cover up the dents on the cabinet. All I used was white paint and a sponge brush.
It took me about four hours to glue all the pieces on to the cabinet doors. Even though Krazy Glue sets very quickly, let it sit over night before applying the grout. Now I purchased some pre-mixed grout at my craft store and let me tell you, it was EXPENSIVE and did not work! I returned it then went to the hardware store and picked up some pre-mixed bright white grout for half the price. Don't get fooled into buying the stuff at the craft store. The grout I got at the hardware store works better and for double the amount of product I only paid $8!!
Follow the directions on the grout container on how to apply and clean. If some pieces fall off, don't worry. Simply re-glue OR just use the grout to add it back on. While I was waiting for the grout to dry I wanted to cover up the dents on the cabinet. All I used was white paint and a sponge brush.

 I was so excited to see how my cabinet was going to turn out, that when I was putting the glass back on the doors.....I tightened the screws too much and well it didn't make it.....SNIFF SNIFF
 So was it as easy as I thought it was going too be? Yes and no, after some trial and error I learned that with the right products it's not so difficult. My least favorite part was applying the grout and cleaning it. The first door took me a few times to get it right, but the second door came out much better. So here's my finished product! Again this is another project that I've never done before, it was a learning process.


Trash to Treasures....Old Tiles into Coaster!
A lot of people have been doing these, so I wanted to see how easy they really are too make. I have a family friend that works at a home goods store and she had some tiles that came in damaged. She gave me the tiles that where still in one piece. SCORE!
 All you need is some Mod Podge, Spray glue, Spray Top coat, Scrapbooking paper cut to the size of the tile and some craft felt for the back.
I prefer to spray glue the scrapbooking paper to the tile instead of using the Mod Podge. I get a lot less bubbles. After gluing the scrapbooking paper to the tiles, let it dry then apply your Mod Podge. Don't forget the sides! When that dries use the spray glue again and glue felt pieces to the backs to prevent slipping. Once everything is dry spray your top coat and your done! We sold these for out Team Betty Minnesota fund raiser! They were a big hit!
All you need is some Mod Podge, Spray glue, Spray Top coat, Scrapbooking paper cut to the size of the tile and some craft felt for the back.
I prefer to spray glue the scrapbooking paper to the tile instead of using the Mod Podge. I get a lot less bubbles. After gluing the scrapbooking paper to the tiles, let it dry then apply your Mod Podge. Don't forget the sides! When that dries use the spray glue again and glue felt pieces to the backs to prevent slipping. Once everything is dry spray your top coat and your done! We sold these for out Team Betty Minnesota fund raiser! They were a big hit!


 Don't have scrapbooking paper? A little bit of paint and some creative thinking make your own design! These stayed right here with me!


Trash to Treasures...Turning a old Plant Holder into a fun Mail Holder
I was getting tired of always having a pile of mail laying on my counters in the kitchen. So when I found this old metal plant holder at a garage sale for .50, my creative bulb in my head went off!
 With the Faux Antique Shelf I did for my entry way I still had a lot of the American Accents Distressed Ivory Kit left. I wanted to see if it worked on metal as well as wood. Now since this was metal I wore gloves while I was sanding it. Again I used just regular sanding paper. Right or wrong, it worked fine for me!
 I then painted it with the Ivory that came with the kit, one coat was all I needed.

 While wearing the gloves again, not to get any metal spurs....I distressed it. Pretty easy and I'm already loving the way it's turning out!


 Now my kitchen is filled with all mix and matched bright colors, so I felt like I needed to add a pop of color to my new mail holder. I had some left over fabric from another project so I used it to accent my piece and DONE!


Trash to Treasures...Faux Antique Shelf
I don't know about you, but I LOVE the new Faux Antique looking furniture that seems to be every where now. But with every new fade, there is usually a pretty high price tag that goes with it. Little did I know it was so easy to do yourself, with very little supplies!
I love to go to garage sales, you can find some pretty nice stuff for really cheap. My mom found this shelf for only $3!
 The supplies I used; Sand paper and American Accents Distressed Ivory Kit, I picked it up at my local hardware store for $14.99
 Step 1: Sanded it down to prep it for an Antique Faux finish look
 Step 2: Painted it an off white color that comes in the kit
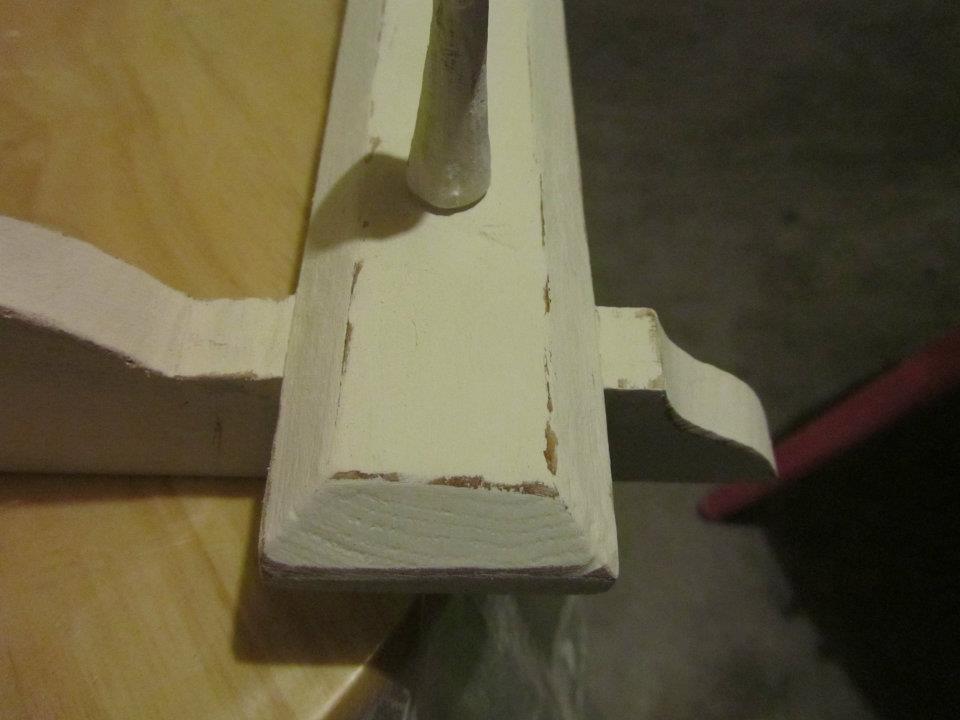
 Step 3: Distress with sand paper. The kit does come with a sanding block, but I found that it didn't give me the look I wanted, so I used fine and medium sand paper. Remember if you don't like it you can simply paper over it and start again! Just make sure that the wood shows through.


 I also made sure to dent up the knobs, to complete the Faux Antique look!
 Make sure to get all the corners and edge really well. I distressed these areas more, since if it was antique these would have more wear.

 Once you have finished distressing the piece you will apply the stain that comes with the kit. You will have to work quickly! That's why I am missing pictures to this step. Follow the directions that are in the kit and work in a small area at a time. Once I finished this, I applied a spray clear coat. And finished! Again this was my first time doing this so it was another learning process.


Subscribe to:
Posts (Atom)